





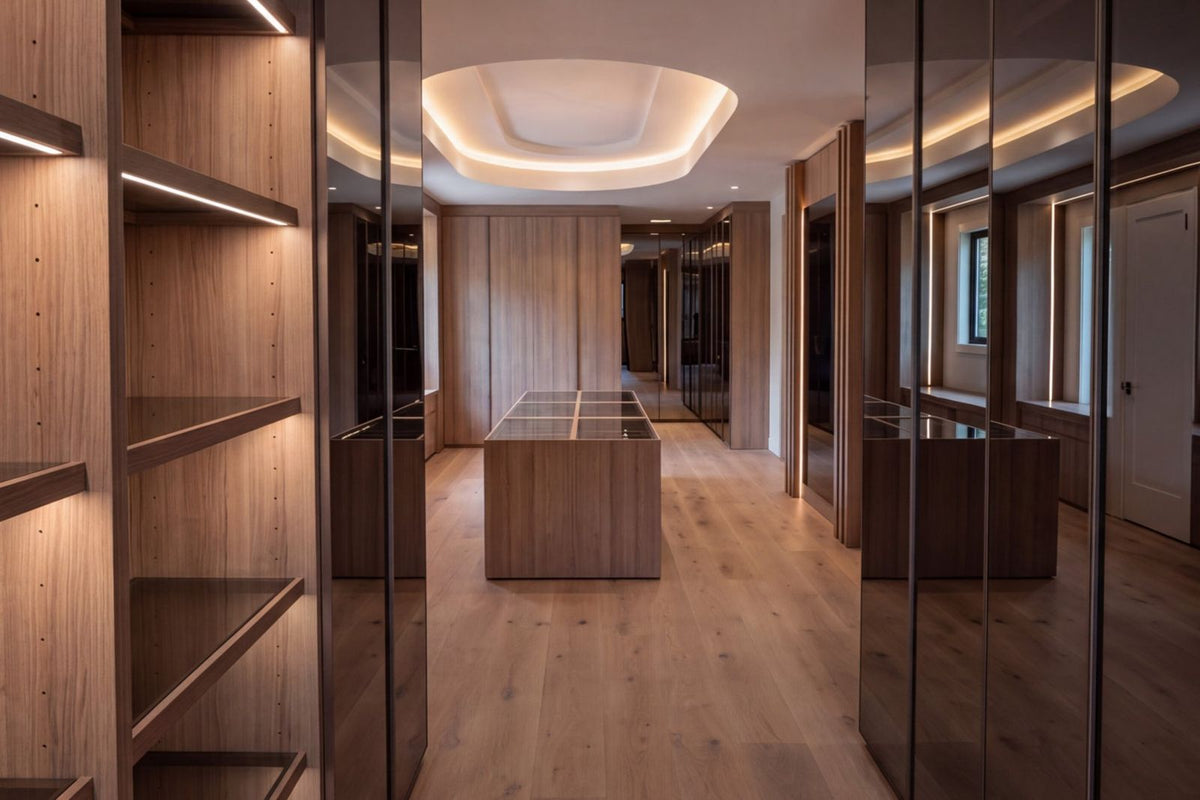
Designing a closet is less about deciding what you want than about deciding things in the right order. Where to start is the real question, because by the time it becomes obvious that a choice mattered, it has usually already been built.
Roughly half the steps below are set by the frame, meaning the structural boxes the closet is built from, and cannot be revised afterward at any sensible cost. The other half stay open much longer. Nobody tells you which is which, so most of the attention goes to finishes while the drawer depth was quietly settled three steps earlier.
These are the eight steps to know, in sequence, and each one says what it locks in.
A note on where this comes from: LAZZONI has been drawing and building custom closets to order in New York since 2009, backed by more than a century of woodworking and manufacturing in Europe, across 12 US locations, inside a 30+ showroom footprint that spans Canada, Europe, Turkey, and Asia.
Step 1. Measure the Room, Then Measure It Again
Take width, depth, and ceiling height at three points, measuring the wall at the top, the center, and the bottom. Walls are rarely square, and older houses are reliably not. The smallest reading is the one that governs, because a unit sized to the widest point will not go in.
Record everything that interrupts a wall: the door and which way it swings, windows, vents, light switches, outlets, radiators, baseboards, and any slope in the ceiling. Each one removes usable wall, and each one is cheaper to design around than to discover during installation.
Our guide to walk-in closet sizing covers the minimum dimensions and clearances these measurements need to satisfy.
Locks in: Everything downstream. Get this wrong, and every later decision inherits the error.
Step 2. Inventory What You Actually Own
This is the step almost everyone skips, and it is the one that decides whether the finished closet fits your life or somebody’s average.
Count your clothing in five groups: long-hang (coats, dresses, robes), short-hang (shirts, jackets, folded trousers, skirts), folded, shoes, and accessories. Write down five numbers.
Count what you own now, not what you intend to own. Aspirational inventories are how people end up with a beautiful hanging wall and nowhere to put socks.
Locks in: The brief for step 4. Still changeable, but only until then.
Step 3. Choose the Layout Geometry
Now the room can tell you what shape the closet is. There are four workable geometries and the width decides between them.
Single-wall suits a narrow room or an alcove: one run, everything visible, no corners wasted. Galley puts runs on two facing walls with a walkway between, which is the most storage per square foot in a long, narrow room. L-shape uses two adjoining walls and leaves floor free for a bench or a full-length mirror. U-shape wraps three walls and holds the most, but needs genuine width to stay comfortable.
Then the part most plans get wrong: decide the door before the walls. An inward-swinging door claims an arc of floor and makes the wall behind it close to unusable, since drawers there collide with it on the way open. A sliding or pocket door frees that arc entirely. This one choice often changes which geometry the room can take.
Small Closet Design
In a reach-in or a narrow walk-in, the geometry is usually decided for you, so the gains come from elsewhere.
Take the run to the ceiling. The strip between a standard-height unit and the ceiling is typically 18 to 24 inches of prime volume, and in a small closet it is often the difference between adequate and cramped. Using every inch is not a slogan here, it is the whole margin you have to work with. Keep the sightline open rather than filling a narrow room with solid doors, because a wall of fronts in a tight space reads as a corridor. And design the corner rather than losing it: where two runs meet, an undesigned corner becomes dead volume behind the adjoining unit, several cubic feet in a room that has none to spare, and it cannot be reclaimed once the units are in.
One more constraint specific to small rooms. In anything under about 6 feet wide, the walkway is the binding limit rather than the wall depth, so adding shelving on both sides can leave you unable to open a drawer fully. Check the walkway before the storage, not after.
The types of closets guide covers which format suits which room in more detail.
Locks in: Circulation, and how many walls you can outfit.

Step 4. Set the Storage Mix
Take the five numbers from step 2 and turn them into proportions of wall. This is the whole point of having counted.
The single largest capacity gain available is double-hanging everything that does not need a full drop. Shirts, jackets, and folded trousers need roughly half the height of a coat, so splitting a run into two rails nearly doubles it. Most closets are built with one rail at one height and give away the volume underneath.
The most commonly under-specified element is drawers. They cost more per foot than shelving, so they are the first thing trimmed when a quote comes back high, and then folded clothing lives in stacks that collapse every time you take something from the middle. Drawers are also the single hardest element to add afterward, because drawer depth is fixed by the frame. A useful rule: if you currently own a dresser and intend to keep it in the bedroom, you need fewer drawers here. If the plan is for the closet to replace it, specify the drawers now.
Shoes deserve their own decision rather than a leftover shelf. Count the pairs, decide how many are worth displaying face-forward on angled shelving and how many can sit flat, and remember that angled shelving costs 2 to 3 inches of depth per shelf.
If the room is wide enough, this is where an island or a bench enters the plan. An island module adds a folding surface and accessory drawers and needs clearance on all four sides; a bench needs clearance on one. Walk-in closet islands come in more configurations than most rooms can take, and the island storage units themselves can be specified with drawers, glass tops, and integrated lighting.
Locks in: The frame. After this, changes mean new units.
Step 5. Plan the Zones Before the Shelves
Zoning at this stage is a planning input, not a tidying habit. You are deciding what sits at eye level, what goes high, and what goes low, because that decides shelf heights, and shelf heights are part of the frame.
The rule is simple: daily items between shoulder and hip, weekly items above and below that band, and seasonal storage at the top. Anything you reach for every morning should not require a step stool or a crouch.
Where things then live within those zones is a separate discipline for once the closet exists, and organizing a closet picks it up from there.
Locks in: Shelf heights.

Step 6. Specify Materials and Finishes
The real decision here is narrower than it looks, and it is about fronts.
A LAZZONI closet is one system, and the front door is what changes: solid, open, or glass. Ferma is the solid front, available in wood, fabric, leather, and lacquered finishes, and it can mix material and color across a single run. Spazio is the open front, with no doors at all. Vetrina is the glass front, in extra clear, fluted, reflective, or mirrored glass, and it stays consistent across a run.
What each of those three names covers is a range, not a single look. Ferma alone spans wood, lacquer, and hide: five wood finishes, eight high-gloss colors in water-based Italian Icro paint, and 20 in leather and suede. Vetrina’s four glasses behave differently from each other too, so the glass is a second decision after the front: extra clear for a plain view of the rail, fluted for a ribbed, semi-transparent screen, mirrored where you would otherwise have to find a wall for a full-length mirror, and reflective, which sits as a seamless mirror until the closet light comes on.
The specification pattern worth copying is to use more than one. Glass fronts go on the display sections, meaning the dresses, suits, and pieces worth seeing. Solid fronts go on the working sections that will never stay presentable, meaning hampers, folded tees, and gym kit. Specifying both across one closet is the recommended approach rather than a compromise.
On finish direction, the movement through 2026 has been away from all-white and toward contrast, earthy tones, and warm wood, for a practical reason as much as a fashionable one: white gives your clothes nothing to sit against.
On construction quality, ask for the certificate rather than the adjective. European manufacturing audited to ISO 9001:2015 for quality and ISO 14001:2015 for environmental management, with FSC, CARB2, E1, CE, and EPA/TSCA VI on the materials, is a specification you can go and check. “Premium build” is not. The certificates page lists each one against its auditing body.
Locks in: Little, while you are still at the design stage. Once production starts, everything.
Step 7. Light It Properly, and Early
Lighting is the most commonly deferred decision in a closet and one of the few that is genuinely irreversible, because integrated lighting routes through the frame. Decide it here or accept a lamp later.
Lighting specialists describe an effective scheme as three layers: ambient for the room, task light where you actually need to see, and accent to pick out what is on display. A single ceiling fixture fails because it puts your own body between the light and the rail.
On specification, aim for a color temperature between 3000K and 4000K, which reads as neutral and lets colors appear as they really are, and a color rendering index of 90 or higher so that similar dark colors stay distinguishable. Anyone who has left the house in navy believing it was black knows why the second number matters.
Then ask how the fitting itself disappears. Specify integrated no-show lighting: the light source sits inside a custom extruded aluminum shelf, so the shelf is the fixture and no hardware shows. It reads as architecture rather than as a lamp added to a cupboard. The channel is milled into the shelf as it is built, so this is drawn now or not at all.
Locks in: Wiring routes, and the shelf the light hides inside. Fully irreversible once built.
Step 8. Decide What Stays Changeable
The last decision is really about the first seven: how much of this closet do you want to be permanent?
Built-in closets are fitted into the room and become part of it. Modular closets come apart and go with you. The choice usually follows from whether you own the space, and it is worth making deliberately rather than by default. The closet modules collection includes a modular renters closet built to move, expand, and reconfigure, which is fitted storage that happens to be demountable rather than a freestanding wardrobe.
Within either choice, adjustable shelving costs slightly more than fixed and buys you years of flexibility, and a made-to-order closet can be extended or reconfigured later, which is the honest answer to whether you are locked in. Whether the whole project is worth what it costs is a different question, and one worth settling before you commit.
Locks in: How much of everything above is reversible. Which is why it belongs at the end, once you know what you are committing to.
How to Design a Closet: Getting the Order Right
The expensive mistakes in a closet are rarely mistakes of taste. They are decisions made in the wrong order: a finish chosen before a layout, a lighting plan added after the frame, drawers cut from the specification to save money and then missed every day for a decade.
Work through the eight steps above, and the irreversible choices get made while they are still choices. If you would rather work through it with someone, book your design consultation. The process follows the same order this article does: you share measurements or ask for help taking them, review a 3D design of the room, and nothing goes into production until the plan is right.
For inspiration once the plan is settled, our walk-in closet ideas guide covers what to do with the space, and the closet design service page shows how the finished rooms come together.
Frequently Asked Questions
How do I design a custom closet?
Work in order: measure the room at several points, inventory what you actually own, choose the layout geometry the room allows, set the storage mix from your inventory, plan the zones, specify materials and finishes, plan the lighting, then decide how much you want to be able to change later. The order matters because roughly half of those decisions are set by the frame and cannot be revised once it is built.
What should I consider when planning a closet?
Three constraints govern everything else: the room’s true dimensions taken at multiple points, where the door sits and which way it opens, and what you actually own today rather than what you hope to own. Settle those before you look at finishes. Also decide early how permanent the closet needs to be, because built-in and modular lead to different plans from the first drawing.
How long does it take to design and install a custom closet?
The design stage moves at your pace: measurements, a 3D design, then revisions until the plan is right. Production is the fixed part. LAZZONI factory orders run 12 to 16 weeks on the East Coast and 16 to 20 weeks on the West Coast, with in-stock items at 2 to 6 weeks. Installation itself is short by comparison. Plan the lead time backwards from when you need the room, not forwards from the consultation.
What is a good layout for a walk-in closet?
The layout follows the room’s width. A single-wall or galley run suits narrow rooms, an L-shape across two walls frees floor space for a bench or mirror, and a U-shape across three walls gives the most storage in wider rooms. Whichever you choose, plan it around the door first, because an inward-swinging door claims an arc of floor and makes the wall behind it hard to use.
Can a custom closet be reconfigured later?
A modular system can: it is built to come apart, move, and be extended, which is why it suits a rented or temporary space. A built-in is fitted permanently, but within it adjustable shelving keeps the interior flexible for very little extra at the design stage. Decide which you want at step 8 rather than discovering the answer later.
Share:
Are Custom Closets Worth It? What You Are Really Buying
How to Turn a Bedroom Into a Walk-In Closet